Tuesday 15 December 2020

live online painting class - rusty truck


What a lovely fun this was! 6 lovely students from USA, Canada and Australia and we painted a scene that I've been wanting to do for years. I drive past this old truck all the time and I've been wanting to put it on paper before it goes off to old truck heaven. Plus painting rust in watercolour is the biz :-)

Next Zoom class will be towards the end of January 2021. Sign up to my newsletter to be in the loop.

My version...

Rusty Truck - demo watercolour painting from live online class


Saturday 5 December 2020

new online watercolour painting lesson - periwinkles


Periwinkles in watercolour - botanical painting lesson


Lots of folks have been asking me to do a botanical tutorial and here one is. I really enjoyed painting this one and I'm so happy to share it with you. I mean, what colour is prettier than periwinkle blue?

This is my longest video tutorial so far, because I explain everything ... how to take photos of flowers you're going to paint from, ideas for composition, how to mix colours to match your flowers and leaves, wet in wet and glazing techniques, and tricks to make your flowers look 3 dimensional.

Paint periwinkles in watercolour with me. Full lesson is only NZ$10. Find it here.


Wednesday 11 November 2020

original artwork SALE


That's right! I'm having a big spring clean. There's so much beautiful artwork stored carefully away, and I'd love it go to loving homes.

So, from 9 November to 9 December, all artwork on my website is 20% off. I will adding new paintings to my shop when I photograph and edit them.

Browse the artwork on sale here.

International shipping available.
Studio visits welcome if you'd like to come see a piece in person.


Monday 9 November 2020

painting a white flower in watercolour


Mount Cook Lilies - white flowers in watercolour


Painting white flowers (or any white object!) in watercolour provides a wonderful challenge. It's a bit of puzzle, really, and takes quite a lot of planning before the brush hits the paper. Here's how I approached these Mount Cook Lilies.


Choosing the photograph

Before I started, I chose a good photograph. This is a very important step. I worked from a photo I took while out hiking last week. When I take photographs of flowers that I'm planning to paint from, I think a little differently than when I'm trying to capture the perfect photo. I'm interested in having everything in focus, wide cropping so that I can see all of flowers and at least some full leaves. I like a strong, contrasty light with lots of shadows. The perfect photo for a print would be quite a different thing. I take lots of photos, because often I compose a painting from a few photos, so that I can get a full bloom and a bud, for instance.

Also, it's super helpful if you can sketch from the real flower first before working from a photo. I did a sketch onsite of a few flowers, and this allowed me to look at the flowers from all angles and see them more as a 3D form. Photos can be so flat!


First wash


Painting white flowers in watercolour - first wash


I mix up a very light washes of Hansa Yellow Medium and Cobalt Blue. Almost no pigment. I wet the whole paper and drop these colours in while the paper is wet. The centre of the flowers is yellow and I drop the blue on the shadow side and the yellow on the sun side. I allow this to fully dry.


Second wash


Painting white flowers in watercolour - second wash


I dampen one petal at a time and paint in the shadow colours - these are what I guess you could call the form shadows, not the shadows cast by the petals on to each other or cast shadows from other objects. 

If you look very carefully at each petal you will often notice they're not completely white and the shadows are not completely grey. All objects reflect the colours from their surroundings, but white objects even more so. Taking this into account I paint the shadows in very light mix of ultramarine blue, hansa yellow medium, sap green and permanent violet.

I work on petals that are not touching, allowing them to dry before painting a neighbour. So in the photo above you can see some of the petals done, and the photo below the whole second wash is complete.


Second wash complete


Cast shadows


Painting a white flower in watercolour - cast shadows


This is where the flower suddenly becomes wonderfully 3D. Although it's quite exciting and the temptation is to really make the flower pop with lots of colour, I do reign myself in and keep the washes very, very light. Because this now the third glaze of colour, it can go dark quicker than you think and it pays to remember that the flower is white ;-)

The cast shadows can also have lots of colour variation in them, so to keep it interesting I drop in blue, yellow, purple or green into the shadows as I see them. 

I work with two brushes at once at this stage, a small, pointy no4 brush to wash in the shadow and a teeny, tiny no0 to drag colour from each wet area into very tight areas, or to form veins or edges. I work slowly around the painting and can go back to an area when it's dry to strengthen it if I have to.


Details


Painting a white flower in watercolour - finishing the petals


Working with a very tiny no.0 brush I place the darkest darks as I see them. I try not to just outline each petal, but rather look carefully to see where the darkest areas are. For the veins in the petals, I'm careful to follow the form.

I add in the flower centres with hansa yellow medium for the light areas and quinacridone Gold for the shadow side. For the deepest shadow here I add ultramarine blue to the quin gold.

With a firm, flat brush I soften some of the shadows, wetting each area that needs it and then very gently scrubbing with the brush. Mother nature is wonderfully random, so a play of hard and soft areas will make things look a bit more natural.


Final stage - background


Painting a white flower in watercolour - adding the background


I add the background last, so that I can carefully carve around each petal and give it a nice edge. I use the same colours that I used for the petals, but shift the mix towards green to imply that the flowers are set against their leaves. 

Covering the petals with a clean sheet of paper, I splash some colours onto the background. I feel like this contrasts well with the tight nature of the flowers themselves and gives a sense of movement.

Finally I sign it and I'm done. 


Mount Cook Lilies
Watercolour
Fabriano paper, 28x19cm
Available.


Thursday 22 October 2020

spring has sprung


Pink magnolia in pen and watercolour

It's that time of year when flowers just can't be ignored! They're popping up everywhere and are so welcome after the bleakness of winter. They taunt me to come look everyday to see if I can see something new, something changed, something I haven't spotted before. It's almost like I'm waking up along with spring.

Here are a few spring things that I've added to my sketchbook lately. I'm hoping to do a flower video tutorial soon too :-)


New tree fern frond "koru"


Yucca's and aloes in pots way too small for them


Periwinkles in watercolour

If you would like to know when my next video tutorial is out, and about upcoming flower painting classes, then please join my mailing list.


Friday 9 October 2020

a visit to cape foulwind


Cape Foulwind Lighthouse - painting in pen and watercolour

A road trip back up to the top of the South Island took us to a visit to a friend's place on Cape Foulwind. Here is a part of the South Island we hadn't really properly explored that much before and it was beautiful. Wild and harsh, but beautiful. All the gorgeous greens and the crashing sea are such a contrast to home - with our big snowy moutains and brown, dry tussock hills. 

I didn't do any sketching while at Cape Foulwind. It's a rather anti-social activity and this was meant to be a good catch-up with our friend. But I took lots of photos and worked on a spread in my sketchbook over a couple of rainy days.


A few little memories captured together on one page in my A4 sketchbook.


Our friend's little cabin nestled cosily in the bush. Everything so green!


Cape Foulwind - beaches, seacliffs and lots of islands.

These sketches all done in The Perfect Sketchbook, A4 size, from EtchrLab.


Sunday 27 September 2020

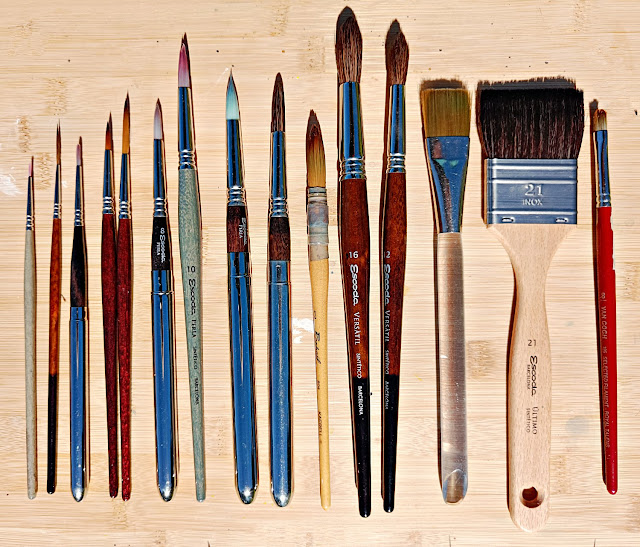
let's talk about : watercolour brushes

My current watercolour brushes

Updated : September 2023


I get a lot of questions about my materials, so this list of my brushes is part of a bigger series of posts where I list all my other watercolour art supplies. Find them under "Tips and Techniques". I try to keep these pages updated regularly, so that if you are following one of my tutorials you can see exactly what I'm currently using.

Like all my other supplies, I do try to keep to being vegan in my choice. All the brushes are synthetic and work as well as natural fibre. I can't see the point of animal cruelty for the making of artist brushes, when synthetic works just the same or even better.

From left to right -

  • Super tiny brush
    Escoda Perla No0
    Who am I kidding? I don't usually have the patience for detail that requires a brush of this size. Haha! But, sometimes, you know, a teeny-tiny brush is just the ticket. And then you want one that is tough and snappy.
  • Fine rigger brush
    Escoda Versatil No0
    For branches, rigging, grasses I use a rigger brush. For studio use only, because it's just too delicate to carry anywhere.
  • Small round brushes
    Escoda Perla No2, travel version and Escoda Prado No4
    For tiny details. The travel brush for painting outside and the Prado for studio work. Escoda recommended the Prado for me, as I asked for a small detail brush that could do more calligraphic type marks than a Perla and I love this brush. It holds a lot of water for it size, has a great point and is very flexible without being too soft.
  • Small round brushes
    Escoda Perla No8, travel version, Escoda Perla No10, Escoda Perla No12, travel version, Escoda Versatil No12, travel version
    Perla and Versatil brushes are my workhorses. The Perla's hold less water than the Versatils, but have a very good point, wonderful spring and snap. I find a combination of these brushes works very well for my style of painting. I have travel versions for painting outside and normal handle versions for studio work.
  • A brush for splatters
    Kaerell Raphael No2
    This was a wonderful brush when it was new, but now it's lost it's point a little. It holds an incredible amount of water and is great for fast, loose paintings. Of all my brushes, this makes the best splatter marks.
  • Largish round brushes
    Escoda Versatil No12, 16 and 18 (not shown)
    These brushes hold a lot of water, have excellent spring and make a very sharp point. So they're both good for big, wet washes, and for detailed work.
  • One inch flat brush
    Unfortunately the name has worn off.
    Fantastic for painting around things where you want a hard edge. For example, where a building juts into a sky. Flat brushes offer good control when you want a sharp line, more than a round brush can.
  • Large flat brush
    Escoda Ultimo 21
    Mostly for pre-wetting the paper for working wet-in-wet and for painting large washes or skies. 
  • Small cat-tounge brush
    Van Gogh No8
    A cheaper, stiffer flat brush is great for scrubbing and lifting out colour. I wouldn't do this with one of my better brushes, as it can ruin them. So this brush works a treat.

Notes...
  • I did spend a lot of time researching the brushes that I felt would work for me and I really think I've found them. Although if Escoda made a larger Versatil travel brush, I'd be in!
  • The 4 travel brushes, with the silver handles, fold up and I pop them in my pencil case to take everywhere with me. They go travelling, hiking and then back to the studio. They're my workhorses and I love them. 
  • For years I only had the 4 travel brushes, plus the 2 flat brushes. I used the travel brushes both outside and inside. But I paint a lot, in case you haven't noticed ;-) So I have since added normal handled versions to the travel brushes to be used in the studio. If you're just starting out you don't need to have copies like I do.
  • Also, if you're starting out, I wouldn't buy a large number of brushes, because learning a new brush takes quite some time. It becomes an extension of your hand and learning a new snap or "flop" can take a while to accomplish. Each brush also holds a different amount of water, so knowing what's on your brush takes a while to become second nature. So my advice is to do some research, buy the best you can afford, then practise, practise, practise before adding a new tool to the bag. There! I hope I just saved you a fortune :-)
  • What would be my minimalist starting out set? How about these 6 ... Prado 2 or 4, Perla 8 and 12, Versatil 16, a 1inch flat and a cheap small flat for lifting out colour.

Happy painting! Any questions, please give me a shout.

Want to see these brushes in action?? Join me on Patreon or Renee's Studio - www.walden.co.nz/learn


Thursday 24 September 2020

new in my sketchbooks

Shark's Tooth Peak


It's been winter (of course!), so not as much outside sketching as I would like. The adventures have still been happening, but the sketchbook has often just stayed in my pack. Seems I'm not as tough as I thought I was ;-) But, hey, that picture above of Shark's Tooth Peak was done in minus temps and was the first time I saw a wash freeze. Haha!

Here are a few sketches in my sketchbooks from the last few weeks. Some of these done on location, some sketched later, working from photos I took while out and about.


West Wanaka - no, it's not autumn. It seems the willows turn orange before getting spring leaves.


Meg Hut, Pisa Range


Miner's Hut, Pisa Range.


Close to home. My favourite bend in the Hawea River.


Overnight hike to Smoothwater Bay.


Zulu swimming the Smoothwater River.


Tuesday 22 September 2020

flower painting workshop


What a fantastic day - painting flowers in pen and watercolour with 8 lovely folks :-)

In the morning we painted two small paintings (a Californian poppy and a coneflower). I showed students how I approach drawing flowers in ink - how to form the shapes, how to capture the essence of a flower and composition (especially when more than one painting will hang together when complete). The morning was about capturing the flowers quickly, much like I would if I was painting them outside in a garden or while out walking.

In the afternoon we painted a larger, more studied painting - a lovely pink lily. Here we worked with lots of light layers on top of a pen drawing, concentrating on soft edges and getting the form and colour just right.

At the end of the day students went home with 3 beautiful completed paintings! And a whole lot of skills so which they can use to capture the flowers as they emerge this spring.

Next flower painting class will probably be later in the year, or early next year. Sign up to my mailing list if you'd like to be in the know.


Thursday 10 September 2020

new watercolour painting tutorial


Excited to announce I have a new full length video tutorial. In this one we paint this ruined miner's hut which is in the historic, gold mining settlement of Welshtown near my home. I visited this sketcher's paradise late last year and I had such fun repainting this scene in my studio so that you can follow along.

In this lesson (40min) we paint...

  • a hot summer sky
  • distant snowy mountains
  • trees and fields
  • stone hut
You'll learn wet in wet techniques, how to charge in with colours to make washes interesting, how to paint stonework and I show you a trick with how to easily add branches to your trees.


Monday 31 August 2020

landscape painting class


Here are a few photos from a very fun day teaching watercolour landscape painting techniques in Wanaka, New Zealand. Students worked on 2 different scenes, painting along with me. And they worked very hard!

Skills covered ...

  •  the rules of aerial (atmospheric) perspective
  • painting different skies
  • how to paint snow, mountains, trees, water and reflections
  • working wet-in-wet and wet-on-dry

It was a full and fun day, and the students results were wonderful.

My next landscape painting class will probably be later in the year. Join my mailing list if you'd like to be notified of the dates.


Wednesday 5 August 2020

zoom painting class - august 2020


Another wonderful Zoom class on 2 August, with 4 students joining me to paint a seascape from the Archway Islands at Wharariki Beach at the top of the South Island of New Zealand.

It's amazing what everyone achieved in just 3 hours. And, as you can see, I was pretty darn chuffed.

Next Zoom class the first weekend (or so) of September. Maximum 10 students and those on my mailing list get first dibs, so make sure you sign up at www.walden.co.nz. I'm already looking forward to it :-)

Sunday 19 July 2020

a month in golden bay

Sunset from the lovely home we were 'house sitting'


So we were meant to have a little escape from our frosty home down south. A couple of weeks at the top of the South Island, to warm our souls. Turns out it was hard to tear ourselves away after a month.

Here are some of the sketches from our trip. A number of these I'm hoping to turn into larger finished works over the next little while. I took heaps of photos too, so I'm looking forward to doing some video tutorials and online Zoom lessons in the next month too.


The house we were staying has a wonderful garden. These Tree Aloes a definite highlight.


Aloes.


Super cold and frosty at home and here the banana plants had fruit!


The last bach left standing in the estuary at Ligar Bay. A bit of history still standing.


Moody, rainy day at Milnethorpe Quay.


Tide coming in at Patons Rock.


Definite sketching highlight.


Last sketch of the bay for a while. View from the Abel Tasman memorial towards Tata Islands.


Wednesday 10 June 2020

online painting class via zoom


You can tell we had a lot of fun :-)

On Sunday, 7 wonderful folks from 4 countries joined me for an online painting class via Zoom. What fun it was! That's super chuffed me in the top middle above. I'm still buzzing :-)

Together we painted a rainy day scene from the Spanish Pyrenees, working from a photo I took a few years ago. I demo'd step-by-step and the students followed along. There was plenty of time for questions and students were able to show me their work as the paintings progressed. And just look at the results!

After the lesson students emailed me a photo of their finished paintings for a short (and friendly) critique by me.

Fantastic feedback from them all. I know we're excited to do this again soon. Join my mailing list if you'd like be notified when the next Zoom lesson is happening.


Just finished another one of @reneewaldenart ‘s online classes. 
What fun this was!Thank you so much Renee! I am thoroughly enjoying your classes and learning soooo much!!! :-) It makes some of the things that have intimidated me feel so much more doable. Your generous teaching has been such a gift. MC, Red Bluff, CA, USA

After a Zoom class
That was absolutely fabulous! So great. You teach really well and clearly, and the visuals were really clear also. I also love your videos, but to be able to get immediate feedback or questions answered works really well too. I really hope you do more! DM, Adelaide, Australia


new online painting lessons

Old church, Siurana, Spain - online watercolour painting lesson


I have two new landscape lessons available on my website. Both cover a large number of skills from composition, to colour mixing, to painting wet on wet and wet on dry. You learn how to paint skies, mountains, trees, buildings and even sheep.

Lesson details are here - WORKSHOPS


Golden Autumn - online watercolour painting lesson